For midlife women who want answers - not more guessing
Now You Have Easy Access To The Comprehensive
ROOT-CAUSE HEALTH OPTIMISATION TEST
Your personalised midlife roadmap to understanding what's really happening
You're exhausted, foggy and flat - yet there's so much uncertainty about what's actually driving these symptoms. You deserve real answers, not more dismissal.

Get instant access to comprehensive root-cause testing PLUS three personalised sessions that decode what your body's been trying to tell you.
TOTAL VALUE: $1,603
REGULAR PRICE: $897 - YOUR INVESTMENT: $397 AUD
(Save $1,206 - that's 76% off!)
REGULAR PRICE: $897
I work with only 5 new women per month to ensure personalised attention and transformational results
Are You Still Struggling With...
As a midlife woman, you want to feel vibrant, strong and clear-headed - not just survive, but thrive. Yet so many women are silently dealing with...

Waking up exhausted no matter how much sleep you get - relying on coffee just to push through each day
Stubborn weight gain around your middle that won't budge, no matter what you try
Brain fog and forgetfulness - struggling to focus like you used to, wondering "is this just menopause?" or "is this my new normal?"
Unpredictable moods and anxiety - when you used to feel steady and in control
Ongoing digestive chaos - bloating, food sensitivities and discomfort that seem to come from nowhere
Sound familiar? There's a reason you're struggling to figure this out on your own.
Most of us weren't taught how to understand what our bodies are trying to tell us - or how to get real answers when symptoms show up.
But to thrive in this next chapter, you need data-driven clarity - not trial and error.
What If You Could...
• Discover what's really driving your symptoms - without guessing which supplements to buy or wellness trends to try
• Get a personalised roadmap based on YOUR body's actual data - not generic advice that doesn't work for you
• Stop wasting money on supplements you don't need - and invest only in what will truly help
• Reclaim the energy, clarity and confidence you thought were gone - and step into this chapter feeling unstoppable

What You're Actually Getting...

See Your
Hidden Imbalances
Discover the mineral deficiencies, toxic load, and imbalances that have been driving your fatigue, brain fog, and stubborn symptoms - the root causes you've been searching for.

Get Your
Personalised Protocol
Know exactly which minerals you need to replenish and what to avoid - plus a complete roadmap covering nutrition, rest, movement, stress, and targeted supplementation based on YOUR results

Reclaim Your
Energy & Clarity
Move forward with confidence knowing exactly what your body needs - so you can feel better than you have in years, maybe even better than you've ever felt.
INTRODUCING
ROOT-CAUSE HEALTH OPTIMISATION TEST + PERSONALISED ROADMAP
Comprehensive root-cause testing, expert 1-to-1 guidance, and a detailed protocol report - everything you need to understand what's happening and move forward with confidence
Data-backed answers with expert guidance - not more guesswork or expensive trial and error

Here's What You're Going To Get
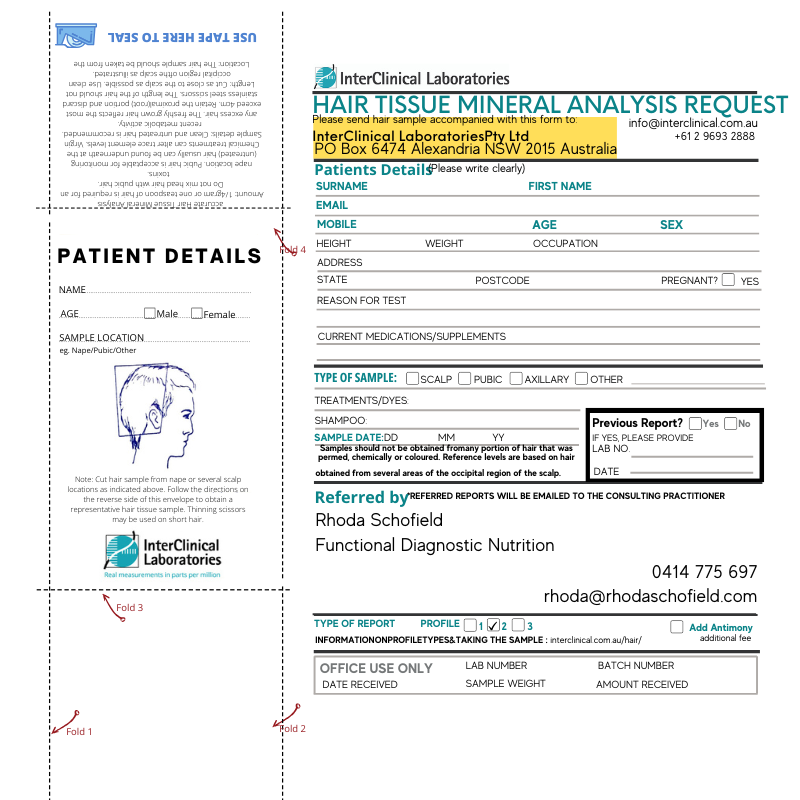
An Easy At-Home
Test Kit
(Value: $299)
You'll receive detailed instructions via email, including a sample envelope to collect a small piece of hair from the back of your head (so small you won't even notice it's missing). Simply pop it in the envelope and send it directly to our accredited laboratory. If you colour your hair, that's completely fine - just make sure it's been at least 4 weeks since your last colour. Your results will reveal the mineral deficiencies, toxic load, and imbalances driving your symptoms.

Three Personalised 1-to-1 Sessions Via Zoom
(Value: $798)
You'll have three private sessions with me: a 30-minute welcome call to review your health history and set the foundation, a 60-minute results and recommendations session where I'll walk you through your findings and explain exactly why you've been experiencing these symptoms, and a bonus nervous system regulation session to support your implementation. Together, we'll create and refine your personalised roadmap so you know exactly what your body needs and your next steps forward.

Detailed Personalised Report and Protocol
(Value: $199)
You'll receive a comprehensive report summarising your test findings with clear, actionable recommendations across the 5 pillars of optimal health - diet, rest, exercise, stress regulation, and supplements. This becomes your personal roadmap, showing you exactly what to focus on, how to prioritise your actions, and the specific steps to support your body and help you thrive in the years ahead. You'll know precisely where to start and what matters most.
WAIT, THERE'S MORE...
I'm Including Three Powerful Resources To Fast-Track Your Results
Because I want you to have everything you need to feel confident, supported, and successful from day one.

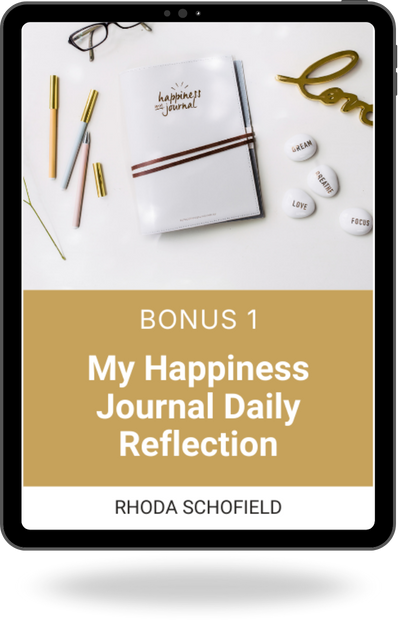
My Happiness Journal
(Value: $109)
My Happiness Journal, a comprehensive guided reflection tool that simplifies emotional wellbeing practices and makes lasting inner clarity and resilience more attainable for midlife women

The Optimal Eating at Home Guide (Value: $99)
The Optimal Eating at Home Guide, a comprehensive food selection resource that simplifies nutritional choices and makes confident, healing-focused eating more attainable for midlife women.


Reinvent Your Energy, Body & Identity Roadmap (Value: $99)
Reinvent Your Energy, Body & Identity, a comprehensive five-step roadmap that simplifies the midlife transition and makes sustained vitality and confidence more attainable for women over 45.

What Our Clients Are Saying

After joining, I realised the value of investing in myself and the results were absolutely worth it. I feel much clearer both physically and mentally - everything is working now
Debbie D, 54
Huntingdon, United Kingdom
If you're sitting on the fence about signing up, I would say to definitely jump in. I feel like a different person - no more severe bloating, more energy, and this really grounded settled feeling instead of anxiety.
Fleur, 42
Central Coast, NSW, Australia
It was well worth it - the initial testing could really target the areas I needed to focus on. My sleep and joint pain are so much better.
Wendy 57
Sydney, Australia
Here's The Truth: Guessing Isn't A Strategy
Your body has been trying to tell you something - here's how to finally hear it.
You're exhausted, foggy, and battling symptoms that won't quit. You've tried different approaches, made changes, researched endlessly - but nothing seems to create lasting change.
Here's what's missing: data about what's actually happening inside your body. Instead of continuing to guess what might help, comprehensive mineral analysis reveals the deeper story behind your symptoms.
Your mineral balance and toxic load significantly impact your energy, mental clarity, and overall wellbeing. When you understand what YOUR body uniquely needs to function optimally, everything changes.
This is why targeted testing matters. When you know what's actually happening beneath the surface, you can finally stop guessing and start making informed decisions that actually work - leading to sustained energy, mental clarity, and lasting confidence.
The answers you've been searching for are here. Are you ready?

AVAILABLE FOR INSTANT ACCESS
Available in Australia, New Zealand, UK, USA and Canada
What's Included...
An Easy At-Home Test Kit (Value: $299)
Three Personalised 1-to-1 Sessions Via Zoom (Value: $798)
Detailed Personalised Report and Protocol (Value: $199)
My Happiness Journal - Posted to Your Door (Value: $109)
The Optimal Eating at Home Guide (Value: $99)
Reinvent Your Energy, Body & Identity Roadmap (Value: $99)
TOTAL VALUE OF: $1603
REGULAR PRICE: $897
YOUR INVESTMENT: $397 AUD
(Save $1,306 - that's 76% off!)
Limited to 5 women per month
Here's Everything You're Getting Today...
When you join the Root-Cause Health Optimisation Package, you'll receive comprehensive testing, expert guidance, your personalised protocol, and bonus transformation resources - everything you need to finally understand what's happening and move forward with confidence.
At-home mineral analysis test kit - revealing the deficiencies, toxic load, and imbalances driving your symptoms
Three personalised 1-to-1 sessions - welcome call, results review, and nervous system support to guide you every step of the way
Your detailed protocol report - covering nutrition, rest, movement, stress regulation, and targeted supplementation tailored to YOUR body's needs
Three bonus resources - My Happiness Journal (posted to you), Optimal Eating Guide, and Reinvention Roadmap to support your transformational


I Understand The Struggle...
Ten years ago, I was standing in my kitchen, staring at yet another supplement bottle I'd ordered online, wondering if thiswould finally be the answer.
I was exhausted. Bloated. Sad. And slowly accepting that maybe this was just how midlife felt - that feeling energyless and uncomfortable in my own body was simply "part of life now."
I tried everything I could research - different diets, expensive supplements, wellness trends. I was determined to figure it out on my own, but nothing created lasting change.
That's when I discovered functional nutrition and comprehensive mineral testing. For the first time, I had real answers - data that showed exactly what was happening in my body, not just guesses and hopes.
The transformation wasn't just physical. It changed everything.
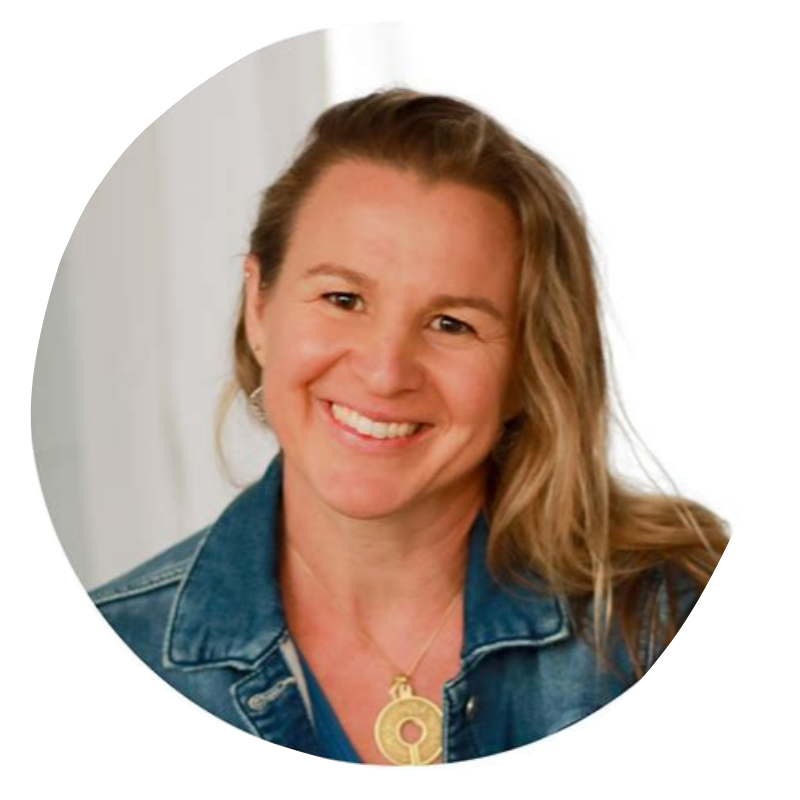
Now, as a Functional Diagnostic Nutrition Practitioner (FDN-P) and Personal Trainer with over 15 years of experience, I help midlife women get the same clarity I found - through comprehensive testing, personalised protocols, and expert guidance every step of the way.
I've worked with hundreds of women who felt dismissed, exhausted, and stuck in that same cycle of trying everything and getting nowhere.
You don't have to accept exhaustion as your new normal. There's a reason you feel this way - and I can help you discover it.
- Rhoda Schofield
People Just Like You Were Struggling With The Same Challenges, See What They Have To Say...

I honestly didn't think it would work, but today I'm doing so much better. Thanks to Rhoda, I'm motivated to actually maintain optimal health instead of just knowing what I should do.
Bronwyn, 40
Sydney, Australia

Rhoda helped me overcome my serious addiction to sugar and fungal issues through virtual consultations across different time zones. I now see her for preventative maintenance and finding ways to continually improve."
Mandy, 38
North Carolina, USA

I went from being anxious and borderline depressed to significant improvement in my emotional wellbeing in just 3 months. Now I wake up each day with excitement and mental clarity that has transformed my confidence and relationships.
Michelle, 45
Brisbane, Australia

I was too exhausted to do the things I loved, but I got my energy back in 3 months and lost weight too. Now I feel more like myself again and can do what I love more effectively.
Grace, 42
Melbourne, Australia

My irritability is nearly gone and I'm back to my 'I can do anything' attitude I used to have. The work with Rhoda was integral in getting me healthy - I never thought I would get there.
Decinda, 42
Gold Coast, Australia

I went from being too bloated to fit into my jeans to a flatter stomach in 90 days. I'm finally able to socialise without worrying about my bloated stomach and feel empowered about optimising my health independently.
Sonya, 48
Perth, Australia
The Root-Cause Health Optimisation Test Is For You If You're Ready To...
This package is for midlife women who are done guessing and ready for real answers. If you're tired of trial and error, wasting money on supplements you don't need, and feeling dismissed - this is for you.
Finally understand what's driving your symptoms - with comprehensive mineral testing that reveals the hidden imbalances behind your fatigue, brain fog, and stubborn weight
Get a personalised protocol based on YOUR body's data - not generic advice, not Dr. Google, but targeted guidance tailored to your unique needs
Stop wasting money on supplements that don't work - and invest only in what your body actually needs to heal and thrive
Move forward with confidence and clarity - knowing exactly what to do next, supported by expert guidance every step of the way
You've tried everything else. This is different - because it's based on YOUR body's actual data, not guesswork.
Available in Australia, New Zealand, UK, USA and Canada
TOTAL VALUE OF $1603
REGULAR PRICE: $897 AUD
(Save $1,306 - that's 76% off!)
I work with only 5 new women per month to ensure personalised attention and transformational results.
Some people think I'm craaazzzyy!
Offering a $1,603 package for just $397? Maybe I am a little crazy.
But here's why I'm doing it: I know what it's like to feel exhausted, dismissed, and stuck. I've been there. And I've seen what happens when women finally get the right testing and guidance - everything changes.
I want to make it easy for you to get the answers you need and start feeling better.
But I can't keep this pricing forever. I work with only 5 new women per month to ensure personalised attention and real results.
Frequently Asked Questions
How much does it cost and what's included?
The complete package is $397 AUD, paid upfront. This includes your HTMA test kit, three personalised 1-to-1 sessions with me, your comprehensive protocol report, My Happiness Journal (posted to you), and two digital bonus guides. Total value: $1,603.
What are the three sessions included?
You'll have three private 1-to-1 sessions with me via Zoom: a 30-minute welcome call to review your health history and goals, a 60-minute results and recommendations session where we'll go through your HTMA findings in detail, and a bonus nervous system regulation session to support your progress. All sessions are scheduled at times that work for you.
How do the lab tests work - what do I need to do?
We use Hair Tissue Mineral Analysis (HTMA) to measure your nutritional status, metabolism, and toxicity levels. You'll receive detailed instructions, forms, and a special envelope. Simply collect a small hair sample (about a teaspoon) from the back of your head and post it to our accredited laboratory. If you colour your hair, you'll need at least 4 weeks of new growth. Full instructions and a video guide are provided.
How quickly will I receive my results?
Once you send in your hair sample, the results and protocol will typically take 3 weeks to be ready to share with you. You'll receive your comprehensive report and personalised protocol and we'll schedule your first review session to go through everything in detail
Are supplements included in that cost?
Supplements are purchased separately. You'll receive personalised recommendations and access to practitioner-grade options at discounted rates. Supplement costs typically range between $450-800 AUD per month, depending on what your testing reveals. I'll always work within your budget and prioritise what's most effective.
Do I need to be really unwell for this to help me?
Not at all. Many of my clients are high-functioning women who look fine on paper but know something's off. You don't need to wait for things to get worse - this is about addressing the subtle signs like fatigue, brain fog, and digestive issues before they become major problems.
What if I can't stick to the protocol or fall off track?
That's completely normal and expected! This isn't about perfection - it's about progress. Your protocol is designed to be flexible and realistic for busy women. During our review sessions, we'll adjust your plan based on what's working and what isn't, so you can maintain momentum without the all-or-nothing pressure.
What if this feels like too much to manage with my busy life?
The beauty of this approach is that everything is broken down into clear, manageable steps with constant support. You'll never be left wondering what to do next. The protocol is designed to fit into real life, not require you to overhaul everything at once. If you can take the first step, I'll guide you through the rest.
When will I receive my Happiness Journal and other bonuses?
My Happiness Journal is a beautiful printed journal that will be posted to your door within 30 days, depending on where you live. The Optimal Eating at Home Guide and Reinvent Your Energy, Body & Identity Roadmap are digital resources that you'll receive instant access to via email after purchase
What exactly goes into a protocol - what's your approach?
Your personalised protocol addresses the 5 pillars of optimal health: nutrition, supplementation, stress management, exercise, and rest. Based on your mineral analysis results, you'll receive specific food recommendations, targeted supplement protocols, lifestyle adjustments, and stress-reduction strategies tailored to your unique needs. Everything is broken down into manageable, prioritised steps so you know exactly what to focus on first.
How long does it take to see results?
Some clients notice early changes within a few weeks - especially in digestion, energy, and mood. For deeper shifts, we typically work through a 90-day protocol, with progress building gradually over time. Remember, we're addressing root causes, not just masking symptoms, so sustainable results take time.
What makes this different to everything I've already tried?
This approach is grounded in comprehensive functional testing that reveals exactly what's happening in your body at a cellular level. You'll receive a personalised, step-by-step protocol based on YOUR unique biochemistry, plus direct expert support throughout your journey. It's clarity and confidence based on actual data.
What if I've already done lab tests? Will you look at those?
Yes - I'll review any relevant past results you have in conjunction with the Hair Tissue Mineral Analysis included in this program. However, I do require specific, up-to-date mineral analysis data to ensure accuracy, so the HTMA testing will always be part of the process
Do we ever meet face-to-face? Where are you based?
All sessions are conducted online via Zoom, so you can participate from anywhere. I'm based in Sydney, Australia, and work with women across Australia, New Zealand, the USA, Canada, and the UK.
I've already spent so much money on my health - what if this doesn't work either?
I understand that frustration completely. That's exactly why this program is grounded in functional testing rather than guesswork. You'll receive specific data about your body's needs, clear action steps, and direct access to me for guidance. It's not magic - it's the right process with proper support, finally done right.
Ready To Finally Understand What's Been Happening?
LET'S GET TO THE ROOT CAUSE OF YOUR HEALTH CHALLENGE
Get comprehensive testing, expert guidance, and your personalised protocol - everything you need to move forward with confidence
You've read this far because something resonated. Maybe it's the exhaustion. Maybe it's the frustration of not having answers. Or maybe you're simply ready to feel like yourself again.
The Root-Cause Health Optimisation Package gives you everything you need to finally understand what's been happening in your body - and a clear roadmap to address it.
What's Included...
An Easy At-Home Test Kit (Value: $299)
Three Personalised 1-to-1 Sessions Via Zoom (Value: $798)
Detailed Personalised Report and Protocol (Value: $199)
My Happiness Journal - Posted to Your Door (Value: $109)
The Optimal Eating at Home Guide (Value: $99)
Reinvent Your Energy, Body & Identity Roadmap (Value: $99)
TOTAL VALUE: $1603
REGULAR PRICE: $897
YOUR INVESTMENT: $397 AUD
(Save $1,306 - that's 76% off!)
I work with only 5 new women per month to ensure personalised attention and transformational results
AVAILABLE FOR INSTANT ACCESS
Available in Australia, New Zealand, UK, USA and Canada

Copyright © 2025 Rhoda Schofield | All Rights Reserved | Email: [email protected]
IMPORTANT DISCLAIMER:
Rhoda Schofield is a Functional Diagnostic Nutrition Practitioner (FDN-P) and Personal Trainer. As an FDN-P, Rhoda does not diagnose, treat, prevent, or cure any disease or condition. Nothing shared is intended to substitute for the advice, treatment, or diagnosis of a qualified licensed physician.
The information provided on this website is for informational and educational purposes only and is not intended to replace a one-on-one relationship with a qualified healthcare professional or as a substitute for consultations with qualified health professionals who are familiar with your individual medical history.
As a health and wellness practitioner, Rhoda is not providing healthcare, medical, or nutritional therapy services or attempting to diagnose, treat, prevent, or cure any physical, mental, or emotional issues.
You should always consult with your own physician, nurse practitioner, physician assistant, therapist, counselor, mental health practitioner, licensed dietitian, or any other licensed or registered healthcare professional before starting any health program or making changes to your current healthcare regimen.
HAIR TISSUE MINERAL ANALYSIS (HTMA) DISCLAIMER:
Hair Tissue Mineral Analysis (HTMA) is a screening tool used to assess mineral status and toxic element exposure. It is not a diagnostic test for any disease or medical condition. Test accuracy depends on proper sample collection by the client. Rhoda Schofield cannot be held responsible for inaccurate sample collection, laboratory variances, or individual interpretation of results. The HTMA test and related services are non-refundable once purchased and the test kit has been dispatched.
SUPPLEMENT RECOMMENDATIONS:
Supplement recommendations provided are based on individual test results and must be purchased separately. These recommendations are not prescriptions and have not been evaluated for efficacy in your specific case. Always inform your healthcare provider of any supplements you are taking, as they may interact with medications or medical conditions.
REGULATORY COMPLIANCE:
This product and the information provided have not been evaluated by the FDA (USA), Health Canada, Therapeutic Goods Administration (Australia), Medsafe (New Zealand), or MHRA (UK) and are not intended to diagnose, treat, cure, or prevent any disease.
NO GUARANTEES:
Individual results may vary. Since every human being is unique on a biochemical level, we cannot guarantee any specific result from our programs. Testimonials and case studies presented represent individual experiences and are not intended to represent or guarantee that anyone will achieve the same or similar results.
LIMITATION OF LIABILITY:
Rhoda Schofield and her associates expressly disclaim any and all responsibility for any liability, loss, or risk, personal or otherwise, which may be incurred as a consequence of the use or application of any information contained on this website or provided through services.
ONLINE SERVICES:
All consultations are conducted via online video conferencing. Technical difficulties, internet connectivity issues, or platform failures are beyond our control. Clients are responsible for ensuring privacy and confidentiality during online sessions.
PRIVACY & DATA PROTECTION:
Client information, including health history, test results, and session notes, will be kept confidential and stored securely in accordance with the Australian Privacy Act 1988. Information will only be shared with third parties (such as accredited laboratories) as necessary to provide services, or as required by law.
REFUND POLICY:
The Root-Cause Health Optimisation Test package is non-refundable once purchased. Laboratory testing costs cannot be refunded once the test kit has been dispatched. Rhoda Schofield reserves the right to offer refunds or credits at her sole discretion on a case-by-case basis.
SUPERVISION REQUIREMENT:
The services provided should be used under the supervision of a licensed physician where required by local law.
AGE REQUIREMENT:
Services are intended for adults 18 years and older. Clients under 18 must have parental or guardian consent to participate.
ACCEPTANCE OF TERMS:
By purchasing this package or using this website, you acknowledge that you have read, understood, and agree to this disclaimer in its entirety.